Mini-split Installation in Greensboro, FL
Mini-split installation in Greensboro, FL covers the entire process, from the initial site assessment and Manual J load calculations to selecting indoor and outdoor units and obtaining permits. The process includes mounting, line-set and electrical work, refrigerant charging, condensate management, and commissioning, with a focus on energy efficiency, quiet operation, and zone-controlled comfort. Homeowners will understand what to expect during installation, post-install performance and humidity checks, and practical tips for long-term maintenance and system longevity.
Mini-split Installation in Greensboro, FL
Modern ductless mini-split systems are an efficient, flexible solution for cooling and heating homes in Greensboro, FL. With hot, humid summers and mild winters, Greensboro homes benefit from correctly sized mini-splits that control temperature and humidity without the energy loss of ducted systems. This page explains the full mini-split installation process, common local concerns, what to expect during installation, and the performance and indoor air quality results you can anticipate after a professional installation.
Why mini-splits are a smart choice in Greensboro, FL
- Local climate demands cooling and dehumidification: Greensboro’s warm, humid summers require systems that both cool and manage moisture. Correctly installed ductless units maintain comfort without creating overly cold, clammy conditions.
- Zoned comfort for older or historic homes: Many homes in the area were built before modern ductwork standards. Mini-splits provide targeted comfort for additions, bedrooms, or living spaces without invasive ductwork.
- Energy efficiency and quiet operation: Modern mini-splits offer high efficiency ratings and quiet indoor operation, improving living comfort while reducing energy costs when sized and installed properly.
Common mini-split issues in Greensboro, FL
- Oversized systems that cool too quickly but do not dehumidify properly
- Improper refrigerant charge or long line sets reducing efficiency
- Inadequate condensate management in humid conditions leading to leaks or mold
- Poor placement of indoor units causing uneven airflow or short-cycling
- Electrical panels without properly sized breakers or disconnects
Site assessment and load calculations
A successful installation starts with a thorough site assessment and accurate load calculation:
- Manual J load calculation: This determines the exact heating and cooling load for each zone by accounting for square footage, insulation levels, window orientation, occupancy, and local climate factors such as humidity and solar gain in Greensboro.
- Room-by-room evaluation: Inspect room usage, ceiling height, existing windows, insulation, and preferred unit locations to ensure even comfort and proper airflow.
- Electrical review: Verify panel capacity, circuit availability, and location for a lockable disconnect near the outdoor condenser to meet code requirements.
- Condensate and refrigerant route planning: Identify optimal wall penetrations and line set paths that minimize visual impact and line length to preserve efficiency.
Selecting the right indoor and outdoor units
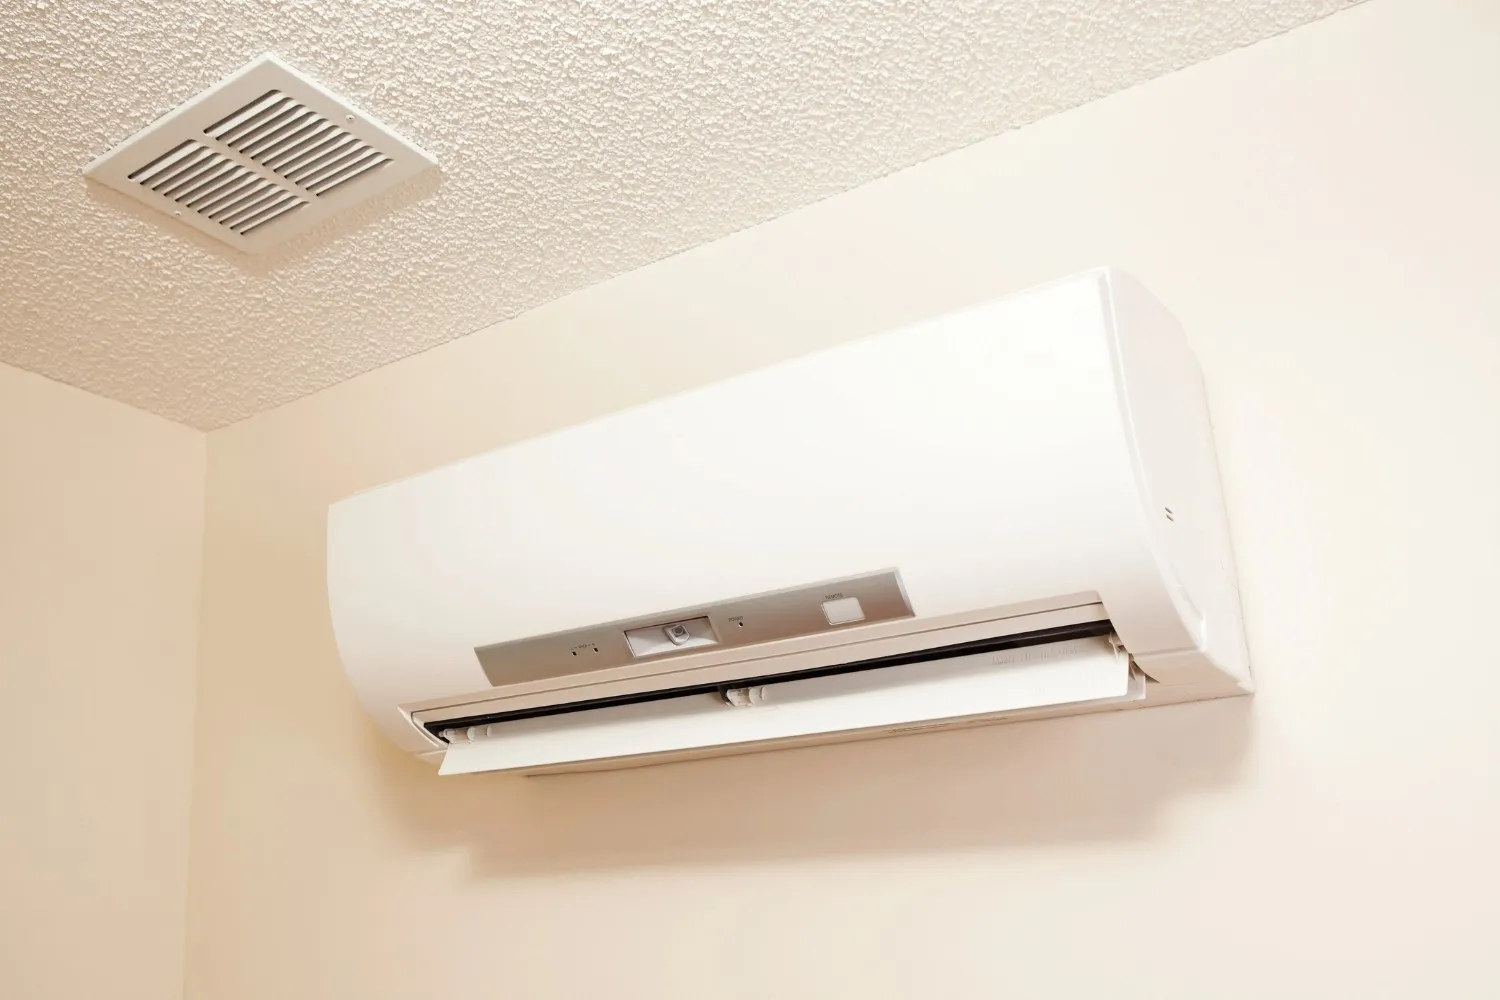
- Unit types: Choose from wall-mounted, floor-mounted, ceiling cassette, or ducted indoor units depending on aesthetics and airflow needs.
- Capacity and efficiency: Select units with appropriate BTU capacity and high SEER/HSPF ratings for energy-efficient operation in Greensboro’s climate.
- Multi-zone vs single-zone: Multi-zone outdoor units can serve several indoor heads for zoned comfort; single-zone systems suit standalone rooms or additions.
- Location considerations: Place outdoor units where airflow is unobstructed, elevated above potential standing water, and shielded from landscaping while allowing for service access.
Permitting and code compliance
- Local permit requirements: Installations require permits and inspections to comply with Florida building codes and local regulations. Permits ensure electrical and refrigerant work meets safety and performance standards.
- Refrigerant handling: Technicians must follow EPA regulations for refrigerant recovery, proper handling, and documentation.
- Electrical and structural codes: Ensure disconnects, wiring, and mounting meet local electrical codes and that wall penetrations are sealed and flashings are properly installed.
Step-by-step installation procedures
- Pre-install preparation
- Confirm load calculations and final unit selection.
- Mark indoor unit mounting locations and outdoor condenser placement.
- Mounting and line-set installation
- Secure indoor mounting bracket and cut a clean wall penetration sized for the line set, condensate drain, and electrical conduit.
- Run insulated refrigerant lines, condensate drain, and power wiring through the chase with minimal bends and shortest practical length.
- Outdoor condenser setup
- Mount the condenser on a level pad or elevated bracket, secure to withstand storms, and leave clearance for airflow and maintenance.
- Electrical connections
- Install dedicated breaker, route power to the outdoor disconnect, and wire the condenser and indoor unit per manufacturer requirements.
- Refrigerant and vacuum
- Connect the line set, valve core removal, and perform a vacuum to remove moisture and non-condensables. Hold vacuum to verify tightness.
- Open service valves and charge the system according to manufacturer specs; measure pressures and temperatures to confirm correct charge.
- Condensate and drainage
- Slope condensate drain properly to the exterior or tie into approved drain locations; include a trap and overflow safety switch where required.
- Sealing and aesthetics
- Seal wall penetrations with durable flashing and caulk; install a neat exterior termination and line cover if desired.
- Control setup
- Configure remote controls, connect thermostats or zoning controls, and set occupancy schedules if available.
Post-install testing and commissioning
- Leak and pressure tests: Confirm no refrigerant leaks and proper system pressures.
- Vacuum verification: Verify vacuum integrity and charge stability.
- Performance checks: Measure supply and return temperatures, calculate delta T, and confirm airflow meets manufacturer specifications.
- Humidity and dehumidification check: Evaluate indoor humidity control under typical summer conditions to ensure comfort without over-cooling.
- Operational verification: Run system through modes (cool, heat, fan, auto) and confirm outdoor unit sequencing for multi-zone systems.
- Documentation and compliance records: Complete required paperwork for permits and refrigerant handling documentation.
Expected results for comfort and indoor air quality
- Consistent zoned comfort: Properly located indoor units deliver even temperature distribution and eliminate hot or cold spots.
- Improved humidity control: Correct sizing and commissioning balance sensible cooling with dehumidification to reduce mold and mildew risks common in Greensboro’s humid climate.
- Better indoor air quality: High-efficiency filters, optional multi-stage filtration, and reduced ductwork exposure lower dust, pollen, and allergen circulation—important in local pollen seasons.
- Energy savings: When sized and installed correctly, ductless mini-splits typically use less energy than older central systems or window units, especially when only cooling occupied zones.
- Quiet operation and comfort: Indoor units operate quietly, allowing continuous use without disturbance, and modern systems maintain steady temperatures with minimal cycling.
Maintenance and longevity tips
- Clean or replace filters regularly, especially during high pollen months.
- Keep the outdoor condenser clear of vegetation and debris; ensure proper airflow.
- Inspect and clean indoor unit coils annually; check condensate drains and condensate safety switches.
- Schedule a preseason performance check to verify refrigerant charge, electrical connections, and control settings.
- Address any unusual noises, reduced airflow, or moisture issues promptly to avoid long-term damage.
A properly executed mini-split installation in Greensboro, FL delivers targeted comfort, reliable humidity control, and improved indoor air quality well-suited to the region’s climate. Following careful assessment, code-compliant installation, and thorough commissioning ensures the system performs efficiently and reliably for years.
hear what our satisfied clients have to say
.avif)

I have nothing but great things to say about this company! From the initial call to trouble shoot our old system to the installation of the new system. Maya was awesome and patient with us and the bank. Stratton, Wilton, and Austin did the removal and install of the systems and they were professional and proficient. I will be recommending this company to everyone and anyone! Thank you for making this less stressful then it needed to be. I'm very grateful for the help and comfort they have given me and my family.
We’ve had issues with our a/c unit freezing up off and on for a month or so. Aden from Keith Key came out and checked our system out. He fixed an issue with the bypass valve and also tuned our fan. Additionally we also replaced our thermostats with new T10’s. He took his time and helped me connect all of them to the WiFi and the app.Aden is very friendly and knowledgeable. I haven’t had an issue with my system since. He was also willing to accept the assistance of our overly helpful shih tzu. Call Keith Key and Aden for any issues with hvac systems, they can get it fixed!
Tryston was amazing! So knowledgeable, pleasant and respectful. Keith Key H/A will forever have my family's business
We had a tenant with no heat during the recent 29 degree weather. I called Keith Key Heating and Air before office hours and left my infomation with their answering service. I got a call back from the office promptly at 8:00 a.m. They were able to schedule us for service the same day. The technician arrived at noon, diagnosed the issue and made the repair. The price was quite reasonable. Everyone that we dealt with was friendly, professional and knowledgeable. I would highly recommend them and will be using them again in the future. Thanks Keith Key Heating & Air!!
Heat wasn't working after the sleet storm and being without power for 18 hours. Keith Key sent Trystan the same day as my call. He did a great job (very personable) and got it repaired in no time. Many thanks!
Keith Key HVAC is wonderful! They service our HVAC and just helped me with a super stressful heating issue while I was out of state. They are very organized and professional, and take extra time to explain and follow up. I just love them!
We've called on Keith Key Heating and Air twice for help. Both times, they responded quickly, and were able to make repairs quickly. The techs we've dealt with have been friendly, reliable, professional and knowledgeable. And they don't dig in your pocket like some have been known to do. I honestly don't know what more we could ask for. A solid 10 of 10, and we highly recommend.
Had to replace my AC and Heating unit. Keith Key Heating and Air was very helpful in finding the right unit money wise for me. The young men they sent was courteous and knowledgeable. They made sure everything was up to my standards before they left. If you have trouble I would highly recommend them to you.
Keith Key regularly services both our personal home and one of our rental properties! They are good about communicating to us about the condition of the units at the rental property which is such a relief! We have had to call them for 2 emergencies and both times the techs appeared happy to be there helping us despite being on the weekend! 10/10 recommend.
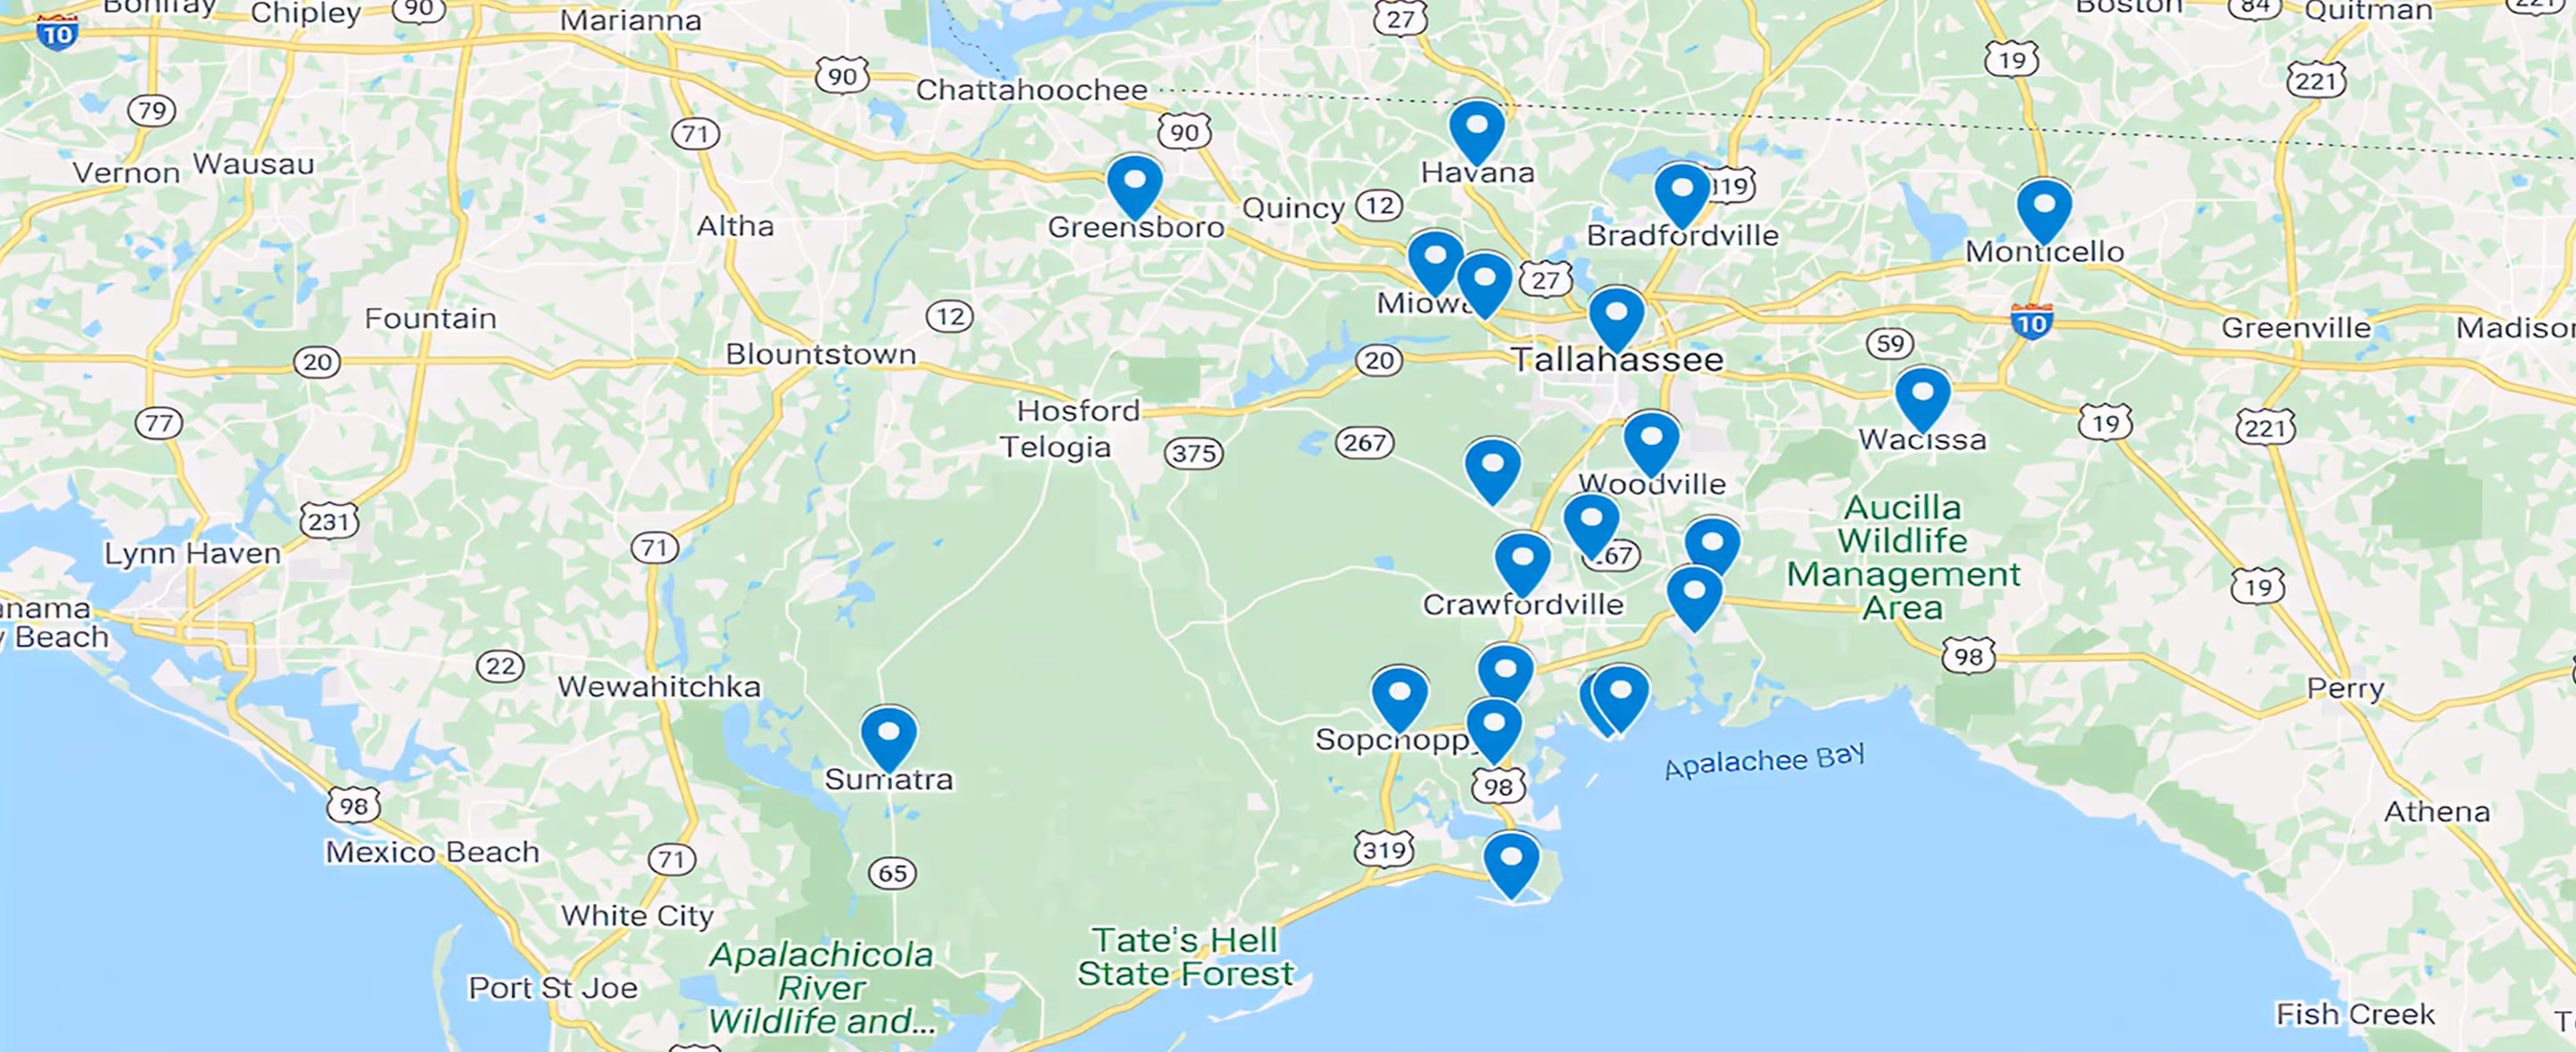
Service Areas