How to Check Your Thermostat Before Heat Pump Repair
Is Your Heat Pump Actually Broken — or Is It Your Thermostat?
Knowing how to check your thermostat before calling for heat pump repair could save you time, money, and the stress of waiting on a service call. Here are the key steps to check right now:
- Check the display - If the screen is blank, replace the batteries first.
- Verify the mode - Make sure the thermostat is set to Heat, not Cool or Fan Only.
- Apply the 5-degree rule - Set the temperature at least 5°F above the current room temperature to trigger the system.
- Set the fan to Auto - On mode runs the fan constantly and can make it feel like the heat isn't working.
- Check the circuit breaker - Look for a tripped breaker for the indoor air handler or outdoor unit.
- Inspect the filter - A severely clogged filter can shut the whole system down as a safety measure.
- Look for loose wiring - With power off, check that thermostat wire connections are snug and free of corrosion.
If none of those resolve the issue, then it's time to call a professional.
Here in Wakulla, Leon, and Franklin Counties, Florida's weather keeps heat pumps working hard year-round — and when something seems off, it's easy to assume the worst. But roughly 25% of HVAC repair calls turn out to be thermostat-related issues that homeowners could have caught themselves with a few quick checks. That's a significant number of service visits that never needed to happen.
Before you pick up the phone, it's worth spending five minutes at your thermostat. A dead battery, a wrong mode setting, or a tripped breaker can mimic the symptoms of a serious heat pump failure — and the fix takes almost no time at all. The team at Keith Key Heating & Air has been serving this area since 1991, and we've seen how often a simple thermostat check is all that stands between a cold house and a comfortable one.

Common how to check your thermostat before calling for heat pump repair vocab:
- heat pump not turning on what to check first
- heat pump running but not heating or cooling what it means
- heat pump troubleshooting tips before calling a professional
Why You Should Learn How to Check Your Thermostat Before Calling for Heat Pump Repair
When your home starts feeling chilly during a sudden North Florida cold snap, your first instinct is probably to look up local HVAC technicians. However, taking a few minutes to evaluate your thermostat is a smart, practical step that can prevent unnecessary diagnostic fees. Think of your thermostat as the brain of your entire HVAC system. If the brain isn't communicating properly, the rest of the body—the outdoor compressor, the indoor air handler, and the reversing valve—won't know what to do.
Many common heating issues are caused by simple user errors, minor power interruptions, or simple component drifts rather than mechanical breakdowns. By learning how to troubleshoot the system's control center, you can quickly determine whether you are dealing with a minor settings issue or actual Signs You Need Heat Pump Repair.
If you do end up needing to call us out to your home in Tallahassee, Crawfordville, or Sopchoppy, having this basic troubleshooting information ready is incredibly helpful. You can tell our technicians exactly what you checked, such as the battery status, the breaker position, and how the system reacted to the "5-degree rule." This helps us narrow down the issue much faster, confirming whether Your Heat Pump Needs Repair or if a simple control recalibration is all that is required to restore your home's comfort.
Step-by-Step Guide: How to Inspect Thermostat Power and Settings

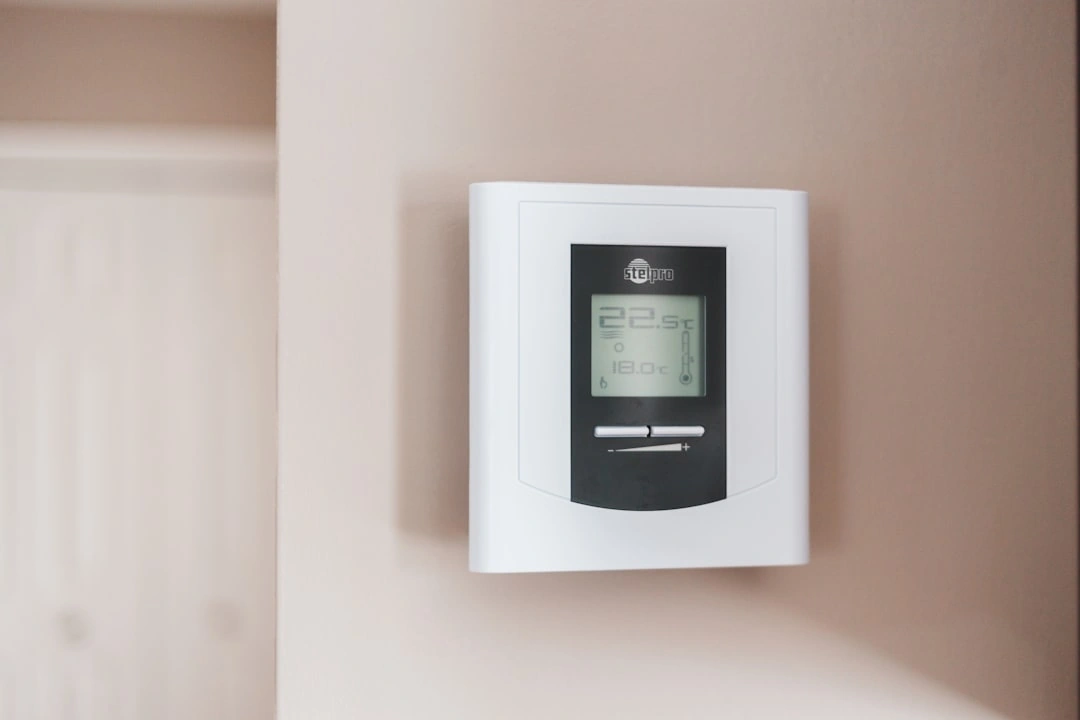
If your thermostat has a blank or flickering screen, it cannot send the low-voltage signals required to kick-start your heating system. Before assuming that your entire system has suffered a massive electrical failure, follow this step-by-step power and settings audit.
First, let's address the most common culprit: dead batteries. Most digital and programmable thermostats rely on batteries (usually AA or AAA alkaline or lithium batteries) as either their primary power source or as a backup to preserve settings during a power outage. Even if your thermostat is wired directly into your home's electrical grid, weak batteries can cause the screen to fade, flicker, or fail to trigger the internal relays that turn on the heat. Pop off the thermostat cover and swap the old batteries out for a fresh set of high-quality lithium batteries.
If replacing the batteries doesn't revive a blank screen, the next step is to inspect your electrical panel. Your heat pump system runs on multiple electrical circuits. Typically, the indoor air handler (which houses the control board that sends low-voltage power to your thermostat) is on a separate circuit breaker from the outdoor compressor unit. Walk over to your breaker box and look for any switches that are sitting in the middle position or fully flipped to "Off." If you locate a tripped breaker, flip it completely to the "Off" position first, and then firmly switch it back to "On."
That if a breaker trips again immediately, this is a clear safety warning indicating an electrical short or overload, and you should stop troubleshooting and call a professional. For more details on electrical issues, read our guide on Heat Pump Not Turning On: What to Check First or learn how to Solve Thermostat Issues in Crawfordville AC systems.
How to Check Your Thermostat Before Calling for Heat Pump Repair: Verifying Mode and Fan Settings
Sometimes, the simplest things are the easiest to overlook. It is surprisingly common for a thermostat to get bumped into the wrong mode during routine house cleaning or by a family member adjusting the temperature in the dark.
- The Mode Setting: Ensure that your thermostat is explicitly set to Heat. If it is set to Cool, Off, or Auto, your heat pump will not engage the heating cycle. In North Florida's shoulder seasons, when we experience warm afternoons and chilly nights, leaving a thermostat set to Auto can sometimes confuse the system or lead to constant switching that wears down your equipment.
- The Fan Setting: Check whether your fan is set to Auto or On. If your fan is set to On, the indoor blower motor will run continuously, even when the heat pump isn't actively warming the air. This results in room-temperature air (which feels cool to the touch at around 70°F compared to your 98.6°F body temperature) blowing out of your vents, making you think the system is failing to heat. Switching the fan to Auto ensures the blower only runs when the heat pump is actively producing warmth.
- The 5-Degree Rule: To test if your thermostat is communicating with your heat pump, use the 5-degree rule. Manually raise the target temperature on your thermostat to at least 5°F above the current room temperature. This significant difference forces the thermostat to send a strong "call for heat" signal to the control board. Listen closely for a click from the thermostat, followed by the sound of your indoor air handler and outdoor unit turning on.
For homeowners utilizing programmable systems, verify that an active hold or schedule isn't overriding your manual adjustments. You can learn more about managing these schedules in our Programmable Thermostat Setup Tallahassee guide, or check out our advice on Thermostat Issues in Alligator Point Fixes.
How to Check Your Thermostat Before Calling for Heat Pump Repair: Inspecting Physical Components and Wiring
If your settings are correct and your batteries are fresh, but the system still refuses to respond, it is time to perform a physical inspection of the thermostat's internal components.
Before you touch any wires, always turn off the power to your heating and cooling system at the circuit breaker. Working on live low-voltage wires can accidentally short out the low-voltage fuse on your indoor unit's control board, turning a zero-dollar fix into a professional repair job.
Once the power is safely switched off, gently pull the thermostat body away from its wall-mounting plate. Inside, you will see a series of small, color-coded wires connected to screw terminals.
- Check for Loose Connections: Over time, normal wall vibrations from slamming doors can cause these tiny terminal screws to loosen. Gently wiggle each wire to ensure it is firmly seated in its designated slot. If a wire is loose, use a small precision screwdriver to tighten the terminal screw.
- Look for Corrosion or Oxidation: In humid coastal areas like Franklin County or Sopchoppy, moisture in the air can cause copper wires to oxidize, creating a thin layer of corrosion that blocks electrical signals. If you notice a greenish or whitish crust on the wires, they may need to be stripped back to clean copper and reconnected.
- The Importance of the C-Wire: Modern digital and smart thermostats require a continuous source of 24V power, which is provided by the "Common" wire (typically blue or black and labeled as "C"). If your home has older wiring, a previous installer might have bypassed the C-wire, forcing the thermostat to "power-steal" from other circuits. This can cause erratic behavior, short cycling, or a complete failure to call for heat.
- Clean Out Dust and Debris: If you have an older mechanical thermostat that uses a bi-metal coil, dust bunnies can settle between the contact points, acting as an insulator and preventing the electrical connection from closing. Use a soft brush, a clean cotton swab, or a gentle puff of canned air to clear away any accumulated dust.
Distinguishing Thermostat Issues From Heat Pump Failures
It can be difficult to tell whether a comfort issue is caused by a faulty thermostat or a mechanical failure within the heat pump itself. Below is a quick-reference table to help you identify where the problem most likely lies:
| Symptom | Likely Thermostat Issue | Likely Heat Pump Failure |
|---|---|---|
| Blank Screen | Dead batteries; loose C-wire; tripped low-voltage fuse. | Total power loss to the indoor air handler. |
| System Clicks but Won't Start | Faulty internal relay; loose "Y" or "W" control wire. | Bad start capacitor; seized compressor; failed control board. |
| Blowing Cool Air in Heat Mode | Fan set to On instead of Auto; incorrect mode setting. | Stuck reversing valve; low refrigerant charge; failed auxiliary heat strips. |
| Short Cycling (On and Off Rapidly) | Poor thermostat placement (near a draft or window); sensor drift. | Clogged air filter restricting airflow; dirty coils; oversized system. |
| Constant Running in Mild Weather | Thermostat set to an extreme temperature; bad temperature sensor. | Low refrigerant; failing compressor; severe ductwork leaks. |
If your thermostat clicks and the screen displays that it is calling for heat, but nothing happens at your indoor air handler or outdoor compressor, the issue is likely a mechanical or electrical failure within the heat pump itself. For instance, low refrigerant causes roughly 95% of heat pump heating failures, which is a problem that requires a licensed technician with EPA Section 608 certification to diagnose and repair.
Additionally, if your system is blowing cool air and the outdoor unit is completely encased in thick, solid ice that does not melt after a normal 10-to-15-minute defrost cycle, your defrost control board or reversing valve may be failing. To learn more about how we resolve these complex mechanical issues, take a look at how Common Heat Pump Problems Fixed by our team can restore your peace of mind.
Upgrading to a Smart Thermostat for Better Efficiency
If your current thermostat is more than 10 to 12 years old, it is approaching the end of its reliable lifespan. Over time, the internal temperature sensors in digital and programmable thermostats naturally begin to drift, leading to inaccurate readings, frequent short cycling, and higher energy bills. Upgrading to a certified smart thermostat is one of the most cost-effective ways to improve your home's comfort and energy efficiency.
Smart thermostats offer incredible advantages for heat pump owners in Florida. Because heat pumps operate differently than traditional gas furnaces, they benefit from specialized control algorithms. A smart thermostat can intelligently manage your auxiliary heating stages (the electric heat strips that kick on when outdoor temperatures drop below freezing), preventing them from running unnecessarily and spiking your electric bill.
In fact, certified smart thermostats are proven to reduce heating runtime by an average of 8% and cooling runtime by 10%. Over the course of a year in our high-runtime Florida climate, those savings quickly add up, often allowing the device to pay for itself within the first year or two.
Beyond saving money, smart thermostats offer modern conveniences like Wi-Fi connectivity, geofencing (which automatically lowers your energy usage when you leave the house), and maintenance alerts that remind you when it is time to change your air filter. If you are considering making the switch, explore our articles on Smart Thermostats for Heat Pump Systems, the Advantages of Smart Thermostat Installation, and how you can maximize your Home Comfort with a Smart Thermostat.
Frequently Asked Questions About Thermostat Troubleshooting
Why is my thermostat screen blank even after changing the batteries?
If you have installed brand-new batteries and the screen remains completely dark, your system is likely experiencing a low-voltage power interruption.
First, check the safety switch on your indoor air handler's access panel. If the door panel was not closed tightly after a filter change, the safety switch will remain open, cutting off all low-voltage power to the thermostat. Push the panel firmly into place to ensure the switch is fully engaged.
Second, your indoor unit's control board contains a small, low-voltage fuse (usually a purple 3-amp or amber 5-amp automotive fuse). If there was a minor power surge or a wire shorted out during your inspection, this fuse may have blown to protect the control board. Replacing this fuse often restores power instantly.
Finally, in humid areas like Crawfordville and Woodville, a clogged condensate drain line can trigger a safety float switch, shutting down the entire system to prevent water damage to your home.
How do I know if my thermostat is miscalibrated?
You can easily test your thermostat's calibration using the "2-degree rule." Tape a reliable, separate digital thermometer to the wall directly next to your thermostat, making sure it does not touch the thermostat body itself. Wait about 15 to 20 minutes for the thermometer to adjust to the room's ambient temperature, and then compare the two readings.
If the temperature difference is greater than 2°F, your thermostat is miscalibrated. This sensor drift can cause your system to run too long or shut off before your home actually reaches your desired comfort level. Many modern thermostats allow you to adjust a temperature offset in the settings menu to correct this calibration issue manually.
What does AUX heat mean on my thermostat?
"AUX heat" stands for auxiliary heat. This indicator means that your heat pump has engaged its secondary heating stage—typically electric resistance heat strips installed inside your indoor air handler—to assist the outdoor unit.
Because heat pumps extract heat from the outdoor air, their efficiency drops when outdoor temperatures fall below 30°F to 35°F. When the outdoor air is too cold to heat your home quickly, or if you suddenly raise your thermostat setting by more than 3 degrees, the thermostat activates the AUX heat to provide a rapid boost of warmth.
While normal during brief cold snaps in North Florida, if your AUX heat indicator stays on constantly during mild weather, it could point to a failing outdoor unit, low refrigerant, or a thermostat configuration error.
Conclusion
Taking the time to understand how to check your thermostat before calling for heat pump repair is a fantastic way to protect your wallet and keep your home running smoothly. Whether it is as simple as popping in fresh batteries, resetting a tripped circuit breaker, or adjusting your fan and mode settings, many common heating hiccups can be resolved in under five minutes without spending a dime.
Since 1991, our family-owned and operated business at Keith Key Heating & Air has been dedicated to delivering honest, reliable, and compassionate HVAC service to our neighbors throughout Wakulla, Leon, and Franklin Counties. We take immense pride in exceeding customer expectations with strong work ethics and expert care. Whether you live in Crawfordville, Tallahassee, Sopchoppy, or Woodville, we install and service all makes and models, ensuring comfort, quality, and trust in every job we do.
If you have worked through these troubleshooting steps and your home still feels like a freezer, don't worry. You can use the interactive Keith Key HVAC Troubleshooter to narrow down the issue further, or simply contact us today to schedule a friendly, professional visit from one of our experienced technicians. We are always here to help keep your home cozy and comfortable, no matter what the Florida weather throws our way!
hear what our satisfied clients have to say
.avif)

I have nothing but great things to say about this company! From the initial call to trouble shoot our old system to the installation of the new system. Maya was awesome and patient with us and the bank. Stratton, Wilton, and Austin did the removal and install of the systems and they were professional and proficient. I will be recommending this company to everyone and anyone! Thank you for making this less stressful then it needed to be. I'm very grateful for the help and comfort they have given me and my family.
We’ve had issues with our a/c unit freezing up off and on for a month or so. Aden from Keith Key came out and checked our system out. He fixed an issue with the bypass valve and also tuned our fan. Additionally we also replaced our thermostats with new T10’s. He took his time and helped me connect all of them to the WiFi and the app.Aden is very friendly and knowledgeable. I haven’t had an issue with my system since. He was also willing to accept the assistance of our overly helpful shih tzu. Call Keith Key and Aden for any issues with hvac systems, they can get it fixed!
Tryston was amazing! So knowledgeable, pleasant and respectful. Keith Key H/A will forever have my family's business
We had a tenant with no heat during the recent 29 degree weather. I called Keith Key Heating and Air before office hours and left my infomation with their answering service. I got a call back from the office promptly at 8:00 a.m. They were able to schedule us for service the same day. The technician arrived at noon, diagnosed the issue and made the repair. The price was quite reasonable. Everyone that we dealt with was friendly, professional and knowledgeable. I would highly recommend them and will be using them again in the future. Thanks Keith Key Heating & Air!!
Heat wasn't working after the sleet storm and being without power for 18 hours. Keith Key sent Trystan the same day as my call. He did a great job (very personable) and got it repaired in no time. Many thanks!
Keith Key HVAC is wonderful! They service our HVAC and just helped me with a super stressful heating issue while I was out of state. They are very organized and professional, and take extra time to explain and follow up. I just love them!
We've called on Keith Key Heating and Air twice for help. Both times, they responded quickly, and were able to make repairs quickly. The techs we've dealt with have been friendly, reliable, professional and knowledgeable. And they don't dig in your pocket like some have been known to do. I honestly don't know what more we could ask for. A solid 10 of 10, and we highly recommend.
Had to replace my AC and Heating unit. Keith Key Heating and Air was very helpful in finding the right unit money wise for me. The young men they sent was courteous and knowledgeable. They made sure everything was up to my standards before they left. If you have trouble I would highly recommend them to you.
Keith Key regularly services both our personal home and one of our rental properties! They are good about communicating to us about the condition of the units at the rental property which is such a relief! We have had to call them for 2 emergencies and both times the techs appeared happy to be there helping us despite being on the weekend! 10/10 recommend.
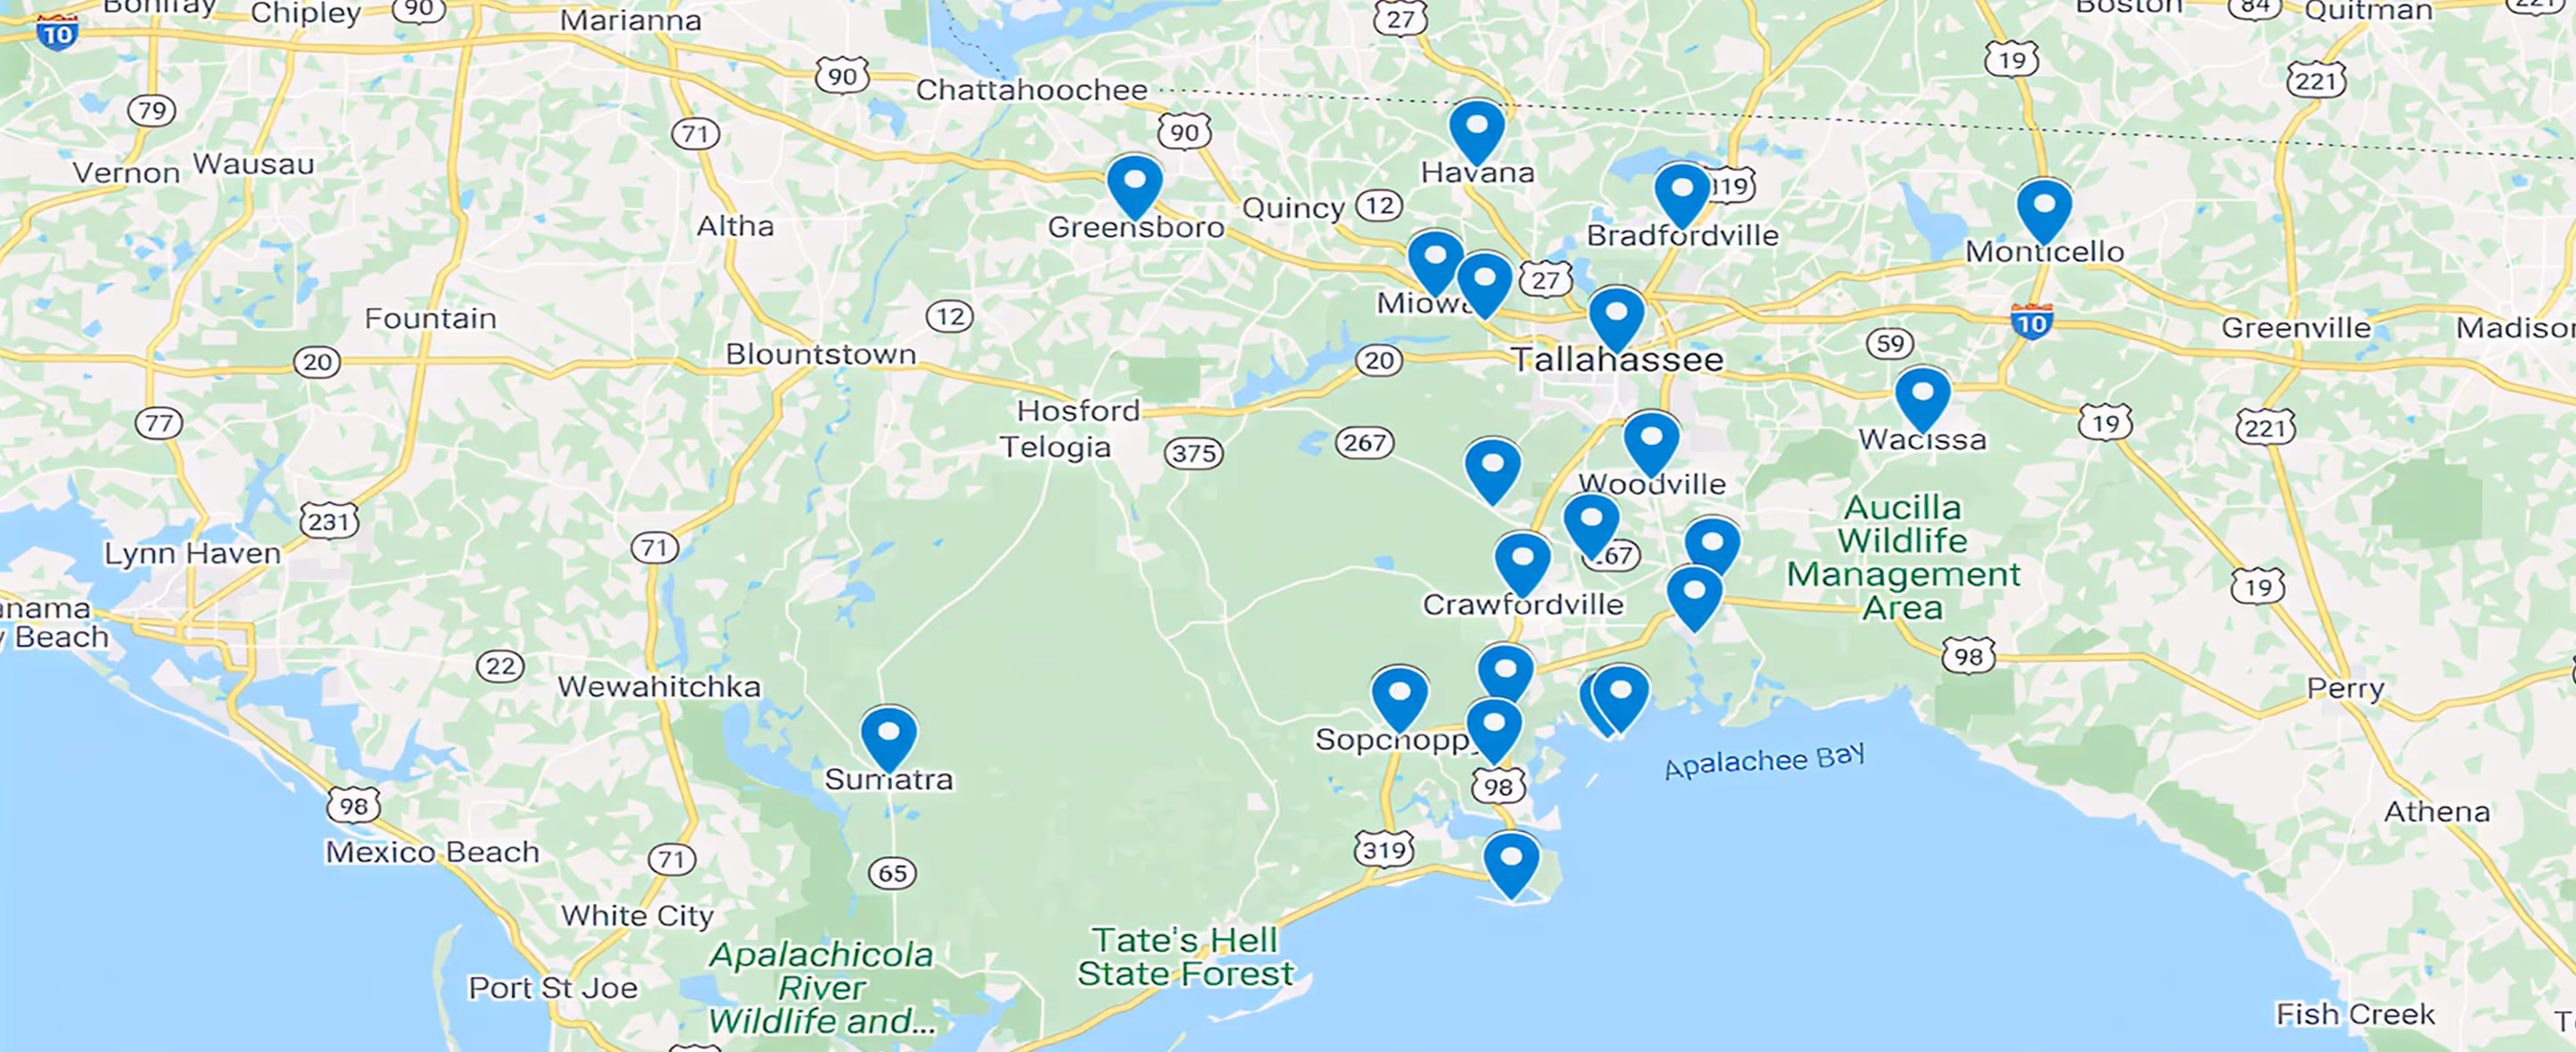
Service Areas